
How to Tie Dye - Complete Instructions
Use fiber reactive dye for tie-dyeing. Do not use all-purpose dye!
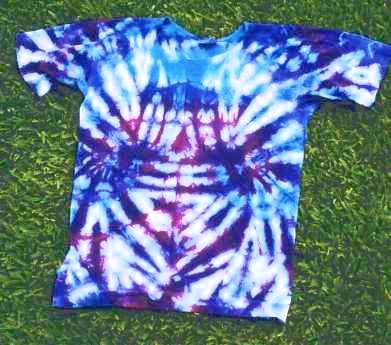
For pictures of successful tie dyeing--essential in helping you decide what you want to create--see my Gallery and some of the many beautiful commercial tie dyeing sites on my Links to other Galleries page.
Getting Started
Study the How to Dye basic recipe first. Make sure you have all the chemicals and supplies you need....Procion MX dyes, sodium carbonate, thin rubber or plastic gloves, measuring cups and spoons, squirt bottles to put the dye solution into, rubber bands, a dust mask for measuring out dyes, and a bucket for pre-soaking the fabric in sodium carbonate solution. If you don't have everything you need, you can still tie today, and be ready to dye when you get the rest of your equipment! Be sure to pre-wash all clothing to remove invisible finishes that can prevent the dye from getting to the fabric.
Why Tie?
The whole point of tie dyeing is to prevent the dye from reaching the fabric evenly. Any place that the dye can't reach will stay white, or a lighter color, of course. The gradations of color from intense to light can be beautiful. You can accomplish this by folding the fabric, tieing it with string, using rubber bands, etc.
Another reason to tie is that it makes each garment of piece of cloth a small, neat bundle--much easier to handle if you have a lot to do. If you don't tie, but just apply the dye directly, you need more space and can do fewer garments or pieces of fabric at a time.
Ways to Tie
Fold a piece of clothing in vertical pleats, and you'll end up with horizontal stripes. Horizontal pleats result in vertical stripes (more slimming, you know). Diagonal pleats make a nice effect. Stitch a loose basting stitch in any shape you like, then pull the threads tight for another form of tie-dyeing that can have really cool results. For concentric circles, grab the cloth where you want the center to be, and pull, until you've more or less made a long tube of the garment, then apply rubber bands at intervals along the fabric. I also like the "scrunch" pattern, made by crumpling the fabric very evenly, so that ultimately it makes a nice flat disk when held with rubber bands.
For the now-traditional spiral, see the FAQ, How do you tie-dye a spiral pattern?: you lay the garment on a flat smooth surface, smooth out all the wrinkles, then make a small pleat right across where you want the center to be. Grab the very center of that pleat with a clothes pin, and begin to twist. As you twist, pleats appear farther and farther away from the center; as these pleats get too large, split the pleats with your hands, keeping each fold the same height above the table, no more than one to two inches in height.
You should not really need pictures to do the above, because it is all trial and error, anyway. You can't know what works best for you until you try it. However, if you want to see pictures of how to do the ties, check out PROchem's illustrations of tie dye folds, actual photos of a tied spiral at Real Tie Dye, and Rit®'s Virtual spiral (though you'll find the dyeing process much easier if you use fiber reactive dyes such as Procion MX, instead of "all-purpose" dye such as Rit®, which requires that you hold the disk of fabric partially submerged in boiling water for a long time). A more advanced technique for tying is illustrated at The Kind Dyes. Mike Fowler's DVD The Art of Tie-Dye (illustrated at left) shows in great detail how to tie a number of different tie-dye folds, as do True Tie Dye's Tom Rolofson's wonderful "Learn How to Tie Dye" series of DVDs (see Amazon affiliate links at right side of this page).
Color Mixing
You can make all the colors you need by mixing lemon yellow, fuchsia, and turquoise. You should probably get black, too (I prefer Dharma's New Black), as it intensifies the other colors wonderfully by contrast, and it's hard to mix yourself.
Simple rules:
a lot of fuchsia and a little yellow make red
red and yellow make orange
yellow and turquoise* make green
a lot of turquoise* plus a little fuchsia makes blue
turquoise* plus fuchsia makes purple
*(remember to double the amounts of turquoise as compared to other colors)
Color Choice
The two most obvious differences between a wonderful tie-dye and a so-so one are color choice and color saturation. You'll find that you really have to work to squirt enough dye into the folds to avoid a large amount of white on the finished garment. In choosing colors to place adjacent to each other, remember the color wheel. Do not place "opposite" colors next to each other, such as red near green, or blue near orange, or yellow near purple: the results would be a muddy mess. If you really like bright colors, as I do, avoid placing a color with red mixed *in* it, such as purple, near green.
A good basic rule is to apply two colors next to each other only if they appear next to each other in the following short list:
fuchsia...yellow...turquoise...purple...fuschia
...or, for a more detailed color scheme, choose adjacent colors from the following expanded list:
fuchsia... red... orange... yellow... green... turquoise... blue... purple...fuschia
It really does help to place fuchsia between red and purple.
For eye-popping color contrasts, you can avoid muddy mixtures of colors by adding a thickener such as sodium alginate to your dye mixtures; applying contrasting colors to the two sides of your bundled folded fabric will then result in alternating stripes.
Use fiber reactive dye for tie-dyeing. Do not use all-purpose dye!
For pictures of successful tie dyeing--essential in helping you decide what you want to create--see my Gallery and some of the many beautiful commercial tie dyeing sites on my Links to other Galleries page.
Getting Started
Study the How to Dye basic recipe first. Make sure you have all the chemicals and supplies you need....Procion MX dyes, sodium carbonate, thin rubber or plastic gloves, measuring cups and spoons, squirt bottles to put the dye solution into, rubber bands, a dust mask for measuring out dyes, and a bucket for pre-soaking the fabric in sodium carbonate solution. If you don't have everything you need, you can still tie today, and be ready to dye when you get the rest of your equipment! Be sure to pre-wash all clothing to remove invisible finishes that can prevent the dye from getting to the fabric.
Why Tie?
The whole point of tie dyeing is to prevent the dye from reaching the fabric evenly. Any place that the dye can't reach will stay white, or a lighter color, of course. The gradations of color from intense to light can be beautiful. You can accomplish this by folding the fabric, tieing it with string, using rubber bands, etc.
Another reason to tie is that it makes each garment of piece of cloth a small, neat bundle--much easier to handle if you have a lot to do. If you don't tie, but just apply the dye directly, you need more space and can do fewer garments or pieces of fabric at a time.
Ways to Tie
Fold a piece of clothing in vertical pleats, and you'll end up with horizontal stripes. Horizontal pleats result in vertical stripes (more slimming, you know). Diagonal pleats make a nice effect. Stitch a loose basting stitch in any shape you like, then pull the threads tight for another form of tie-dyeing that can have really cool results. For concentric circles, grab the cloth where you want the center to be, and pull, until you've more or less made a long tube of the garment, then apply rubber bands at intervals along the fabric. I also like the "scrunch" pattern, made by crumpling the fabric very evenly, so that ultimately it makes a nice flat disk when held with rubber bands.
For the now-traditional spiral, see the FAQ, How do you tie-dye a spiral pattern?: you lay the garment on a flat smooth surface, smooth out all the wrinkles, then make a small pleat right across where you want the center to be. Grab the very center of that pleat with a clothes pin, and begin to twist. As you twist, pleats appear farther and farther away from the center; as these pleats get too large, split the pleats with your hands, keeping each fold the same height above the table, no more than one to two inches in height.
You should not really need pictures to do the above, because it is all trial and error, anyway. You can't know what works best for you until you try it. However, if you want to see pictures of how to do the ties, check out PROchem's illustrations of tie dye folds, actual photos of a tied spiral at Real Tie Dye, and Rit®'s Virtual spiral (though you'll find the dyeing process much easier if you use fiber reactive dyes such as Procion MX, instead of "all-purpose" dye such as Rit®, which requires that you hold the disk of fabric partially submerged in boiling water for a long time). A more advanced technique for tying is illustrated at The Kind Dyes. Mike Fowler's DVD The Art of Tie-Dye (illustrated at left) shows in great detail how to tie a number of different tie-dye folds, as do True Tie Dye's Tom Rolofson's wonderful "Learn How to Tie Dye" series of DVDs (see Amazon affiliate links at right side of this page).
Color Mixing
You can make all the colors you need by mixing lemon yellow, fuchsia, and turquoise. You should probably get black, too (I prefer Dharma's New Black), as it intensifies the other colors wonderfully by contrast, and it's hard to mix yourself.
Simple rules:
a lot of fuchsia and a little yellow make red
red and yellow make orange
yellow and turquoise* make green
a lot of turquoise* plus a little fuchsia makes blue
turquoise* plus fuchsia makes purple
*(remember to double the amounts of turquoise as compared to other colors)
Color Choice
The two most obvious differences between a wonderful tie-dye and a so-so one are color choice and color saturation. You'll find that you really have to work to squirt enough dye into the folds to avoid a large amount of white on the finished garment. In choosing colors to place adjacent to each other, remember the color wheel. Do not place "opposite" colors next to each other, such as red near green, or blue near orange, or yellow near purple: the results would be a muddy mess. If you really like bright colors, as I do, avoid placing a color with red mixed *in* it, such as purple, near green.
A good basic rule is to apply two colors next to each other only if they appear next to each other in the following short list:
fuchsia...yellow...turquoise...purple...fuschia
...or, for a more detailed color scheme, choose adjacent colors from the following expanded list:
fuchsia... red... orange... yellow... green... turquoise... blue... purple...fuschia
It really does help to place fuchsia between red and purple.
For eye-popping color contrasts, you can avoid muddy mixtures of colors by adding a thickener such as sodium alginate to your dye mixtures; applying contrasting colors to the two sides of your bundled folded fabric will then result in alternating stripes.

No comments:
Post a Comment